How can you make ceramic glazes yourself?
Ceramic glazes are an essential part of pottery making as they seal, protect and aesthetically enhance the clay. Making your own glazes offers potters the opportunity to create unique and individual effects. In this blog post, we explain the basic steps and materials for making ceramic glazes and provide tips for successful experiments.
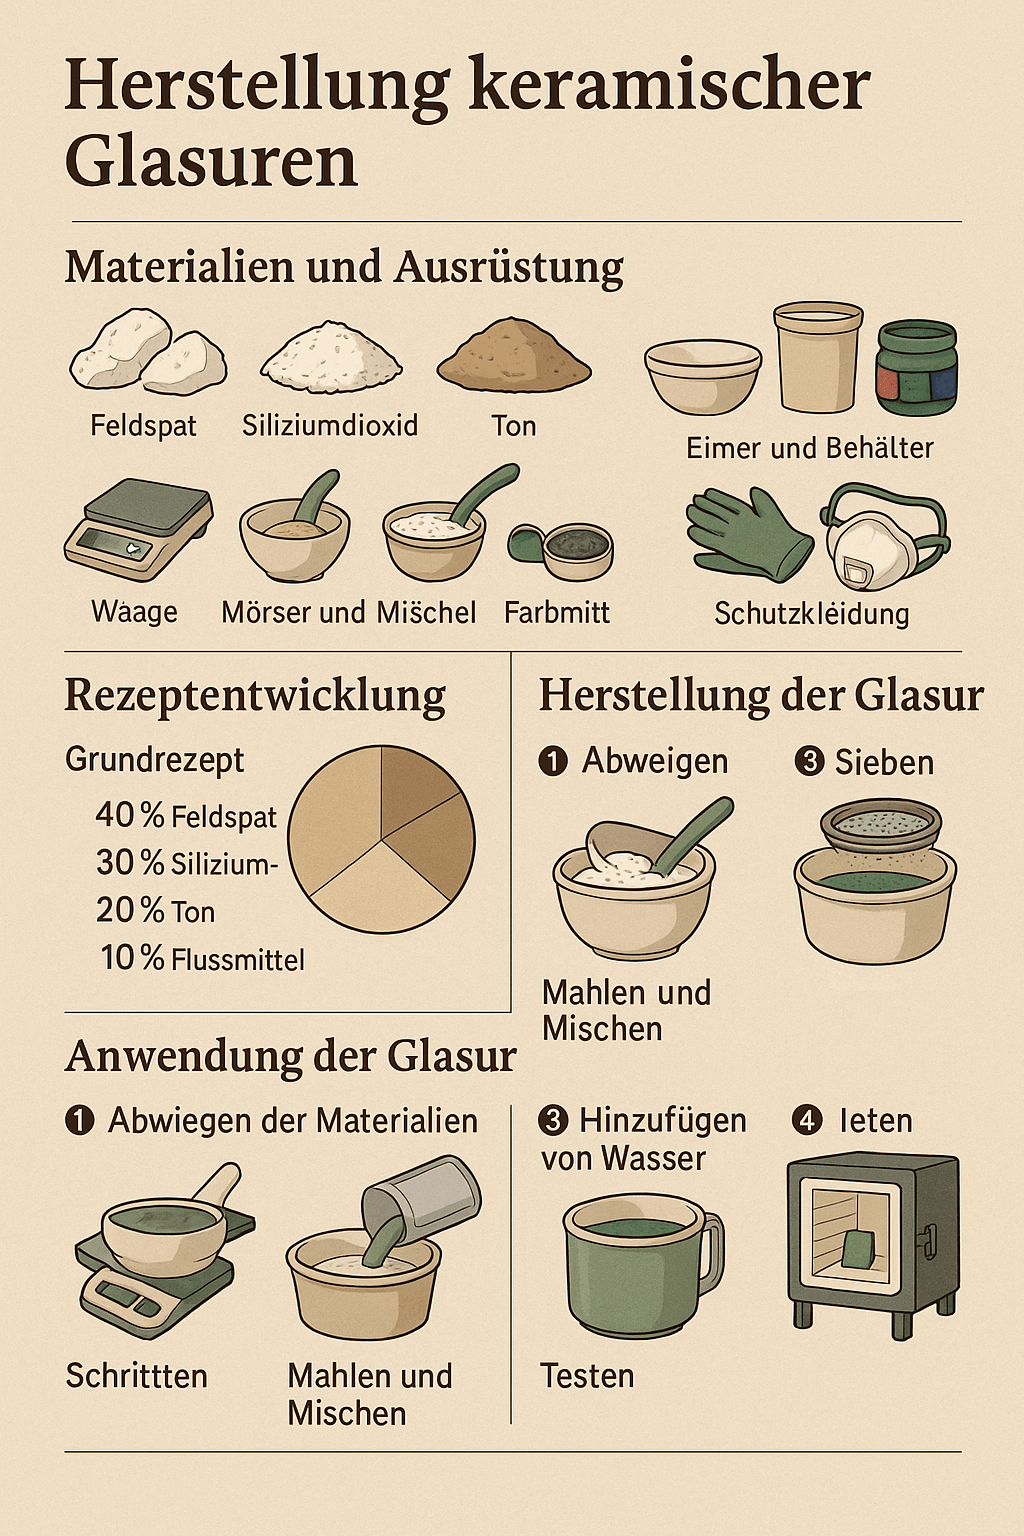
1. Basic materials and equipment
Materials:
- Feldspar: A major component of the glaze that helps form the glass framework.
- Silicon dioxide (quartz): Forms the glaze structure and increases strength.
- Clay (kaolin or ball clay): Gives the glaze adhesion and plasticity.
- Flux: Substances such as potassium carbonate, sodium carbonate or calcium carbonate that lower the melting point of the glaze.
- Colorants: Metal oxides such as iron oxide, copper oxide, cobalt oxide and chromium oxide that give color to the glaze.
Equipment:
- Scale: Precision scale for accurately weighing materials.
- Mortar and pestle: For grinding and mixing the powders.
- Buckets and containers: For mixing and storing the glaze.
- Sieve: For removing lumps and impurities.
- Protective clothing: Gloves, safety glasses and a respirator to protect against dust and chemicals.
2. Recipe development
Basic recipe: A simple glaze recipe consists of:
- 40 % feldspar
- 30% silicon dioxide
- 20% clay
- 10% flux
Adjustments:
- Melting point: Increase or decrease the amount of flux to change the melting point of the glaze.
- Finish: Add more clay to create a matte finish or more feldspar to create a glossy glaze.
- Color: Experiment with different metal oxides to achieve different shades.
3. Making the glaze
Step 1: Weighing the materials
- Weigh the required amounts of feldspar, silica, clay and flux using a precision scale.
Step 2: Grinding and mixing
- Grind the materials in a mortar or use a ball mill to achieve a fine powder form.
- Mix the ground materials thoroughly in a bucket.
Step 3: Add water
- Slowly add water to the mixed powders and stir continuously until a smooth, creamy consistency is achieved.
Step 4: Seven
- Pour the glaze through a fine sieve to remove lumps and impurities.
Step 5: Storage
- Store the finished glaze in a sealed container to prevent it from drying out.
4. Application and testing
Applying the glaze:
- Dipping: Dip the ceramic piece completely into the glaze and let it drip dry.
- Brushing: Apply the glaze in even layers with a brush.
- Spraying: Use a spray gun for an even coating.
Testing:
- Sample pieces: Test the glaze first on small samples to check the color, texture and melting behavior.
- Firing: Firing the samples in the kiln at the recommended temperature and observing the results.
- Adjustments: Adjust the recipe as needed to achieve the desired effects.
5. Safety instructions
- Chemical handling: Always wear protective clothing, gloves, safety glasses and a respirator when working with chemicals and fine powders.
- Ventilation: Work in a well-ventilated area to avoid inhalation of dust and fumes.
- Storage: Store chemicals and glazes out of the reach of children and pets.
Conclusion
Making your own ceramic glazes is a creative and rewarding process that allows you to create unique and individual pieces. By experimenting and adjusting the recipes, you can achieve a variety of effects and colors. With the right materials, equipment and safety measures, you can take your pottery to the next level and create your own bespoke glazes. Have fun experimenting and pottering!
Share